This hints and tips section contains spoilers. Please do not read any further if you do not want to potentially ruin the story plot or your game experience.
A Journey Through the Galaxy[]
It is recommended to visit every system and enter all the space lounges at the first available opportunity. After you have visited a orbits in a system, a green tick mark will appear next to it on the map. Journeying through the galaxy will gain you the following:
- Goods prices - Know where to find parts for blueprints, and at good prices
- Blueprints - Many space lounges contain blueprints for useful items
- Coordinates - There are several systems' coordinates that can only be bought in space lounges.
Finding the Right Ship for You[]
Picking a ship is mostly based on personal preference. Someone might love a certain ship, but someone else may hate it, given their play style. Fortunately, there are a few things one can keep in mind that will make the choice easier.
- Cargo space/equipment slots - Even a fighting centered ship like the Dark Angel (85 cargo space without the Kaamo Club upgrade) can become a viable trading ship with 3 or more Rhoda Blackholes. This is because each Rhoda Blackhole increases the ships' cargo capacity by 100%. (Example: a Dark Angel with 3 Rhoda Blackholes will have a total of 340 cargo space.)
- Primary weapons/secondary weapons - More is better. Some ships do sacrifice secondary weapon slots for primary weapon slots or vice versa.
- Turrets - Some people love turrets, others don't. This is a personal choice.
- Hull/Maneuverability - More is better. This comes down to your fighting style; the only way to know is to try out several ships. Shields, Armor, and Thrusters can improve these factors.
If you still don't know what ship to choose, you can take ships for test drives. Simply buy the desired ship and fly around in your current orbit. If you do not like it, sell the ship and buy another ship to test it. Ships have fixed prices and this allows you to buy/sell ships without any loss.
Dealing with Hostile Reputations & Maintaining a Neutral Balance[]
As you follow the storyline doing missions primarily for the Terran faction, you eventually gain "hostile" status with the Vossk, which causes all Vossk to attack you when you enter their systems. The same can occur if you perform too many side missions for either the Midorian or Nivelian factions. If you want to restore a "neutral" status for any faction, fly as fast as possible (boosters are recommended) and dock at the hostile faction's station (your ship must be protected enough to survive incoming damage on the way to the station). Most hostile stations will offer you a chance to dock if you pay a bribe, but some might refuse to offer any chance to dock. Once successfully docked at the hostile station, visit the Space Lounge to take on and perform some side missions for that faction. Perform such faction side missions until your status returns to neutral. You can view your status with each faction at any time by touching the Status button when docked at any station. Also, you might find a diplomat at any Space Lounge. He will take 16,000 credits (sometimes lower) and manipulate your data, so you will not be recognized as an enemy to that faction any more.
In addition to working side missions for factions, you can also re-balance a "neutral" status by hunting pirates in systems whose factions are dangerously close to being your enemy (but not yet your enemy.) Conversely, hunting pirates too much in one faction's systems can cause you to lose "neutral" status with that faction's rival. For example, if you hunt too many pirates in Terran territory, you will move closer to a "hostile" status with the Vossk. You will need to travel to a Vossk system and help them hunt pirates until your Terran/Vossk reputation status bar returns to a more neutral center. The same is true for your Midorian/Nivelian reputation status bar. If your goal is to move freely throughout the galaxy, trading goods for profit and working side missions for all factions, then you need to constantly maintain a neutral balance with all 4 factions. Remember that any positive action that you perform for one faction will be viewed as a negative action by that faction's rival.
Some say that traveling to a friendly station and shooting down friendly ships until they become neutral states will earn you respect for that faction's rival. However, if you do this in heavily traveled space, with many witnesses nearby, all ships in the area will instantly turn from green or yellow to red status and shoot you down. Also, the security forces of this station may remember you when you try to return at a later time. Getting by them may require you to mount that faction's Signature (or a signature of a neutral faction) to your ship. This is a much faster way because all you need to do is blow up a couple of ships from a faction and hope to find their signature card. (Signatures are only avaible in the Valkyrie expansion pack).
Extreme Mode: Supernova DLC Tips and Tricks[]
To play Supernova DLC in Extreme Mode in order to unlock the Specter is not easy. Pirates will appear more often, and it doesn't guarantee that a secure system is free of pirates. At higher levels, you'll notice that the most powerful pilots in the whole galaxy is not the stealth fighters, not the Voids, but the pirates. A few hits from their specialized Tyrfing Blaster could wash your defense off. Even Dark Matter Laser hits from Stealth Fighters are causing less damage than the Blaster from Pirates.
The best tactic to survive is to avoid fight especially with Pirates, Stealth Fighters, and basically all hostile forces. However, the Supernova DLC also gives us a few extremely helpful equipments to be used. So, until you are able to do glass-cloud mining, avoid pirates. Fight them only when the storyline prompts you to fight.
After you can collect Plasma, you can make a Pandora Leech, Shock Blast (this is preferable), and Particle Shields. Also, you need 4 M6 A4 "Raccoons" in order to success this trick. This is the most effective tactic to be used against enemies.
There are basically 2 ways to fight swarms of enemies in extreme difficulty :
- First Method : You'll need good shield and armor, a bunch of Liberators, Patala, AMR Extinctor, or other kind of explosive secondary weapons, a Yin Co. Shadow Ninja, and good primary weapons. This is the easiest method. Cloak yourself, then fire the enemies. When your cloak is finished and you still are fighting against the army of pirates/stealth fighters, I guarantee you 100% - your ship is close to destruction. When you focus to fire an enemy, others will fire at you like you're the most wanted person in the whole galaxy. This method proves to be easy, but costs a lot of money as you need to stock a large amount of secondary weapons, energy cells (to cloak yourself), and not so secure.
- Second Method : This is my favorite and actually my method. You'll need 4 M6 A4 "Raccoon" lasers, Pandora Leech, with good shield and armor (of course). In this way, you can kill a whole gang of pirates - even I managed to kill all pirates that are guarding the Loma System. First, directly fly toward the middle of the gang of pirates. Of course, you'll get hit from them. But don't worry. You just need to manuever, and hit the enemies with your 4 lasers. If all lasers hit the enemy accurately, the enemy will be finished off quickly in 2 hits !! But if you use this weapon in the first method, you have to pause for a while to aim at the enemy, and that costs you your safety. In this second method, while you aim at the enemy, your Particle Shield will give you good defense. And don't forget to move too. The Pandora Leech will absorb the energy of 3 enemy ships and repower your ship quickly. When your health is considerably small, try to absorb 3 ships' energy and use your booster to escape. But don't literally escape the pirate, you just circle around fastly and keep a near distance with these pirates, so the Pandora Leech can perform its job well, and you are not getting hit by enemies during this repowering process. You can slide your finger to left or right too! The most important thing in this process is not to get hit.
If you don't get hit, soon your energy will be full again in no time, thanks to the Pandora Leech. Then, attack the enemies again with your Raccoons. Repeat till all enemies are obliterated in destruction. The advantage in this method is that you didn't need any secondary weapons, or any energy cells to cloak yourself. Just a Pandora Leech, and 4 Raccoons. Using the Raccoon, once again, is very risky. You have to aim accurately to hit the enemy, and while you aim, you are a slow target to other pirates. But if you hit precisely, the damage is worth the effort. If you absorb 3 ships energy, your energy will be filled again very quickly, trust me.
A turret or a Shock Blast in the second method is also reccomended.
"This station is currently unmanned"[]
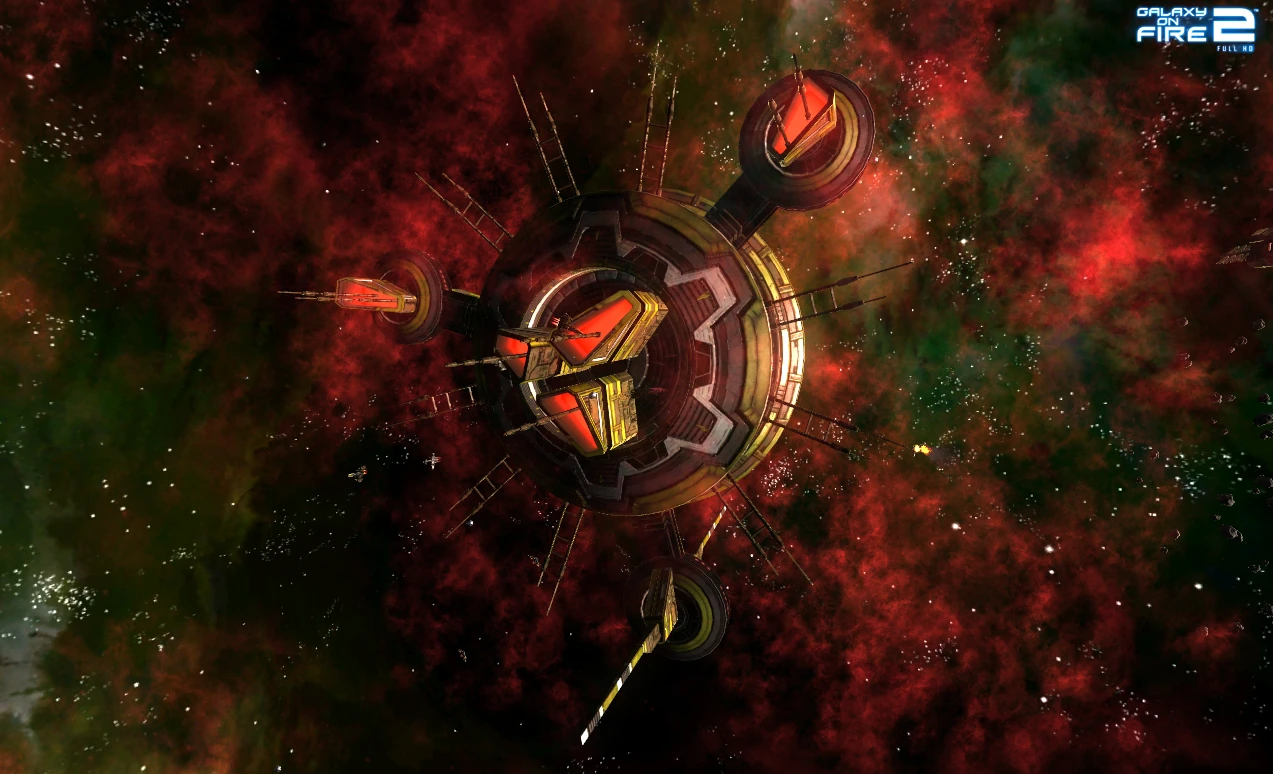
A pirate station causing the local space station to be unmanned.
If you attempt to dock at a space station and receive a message saying that the station is currently unmanned due to too many pirates being in the surrounding area, you are unable to dock because there is a "hidden" pirate base not too far away.
To find the pirate base, look for a reddish area of space dust and head towards it. As you near the red space dust, you will begin to see the pirate base; a few pirates may be launched which you'll need to kill but ultimately you need to destroy the base.
Tip: Turn off automatic turrets and avoid attacking any pirates near the faction's station, because if you accidentally kill any faction ships, they'll all turn hostile to you until you leave the system for a while and don't come back for some period of time. Instead, boost towards the pirate base and take it out first.
Make sure you bring a tractor beam: the bases often have powerful weapons/equipment that you can upgrade your ship with, or sell to earn money early in the game.
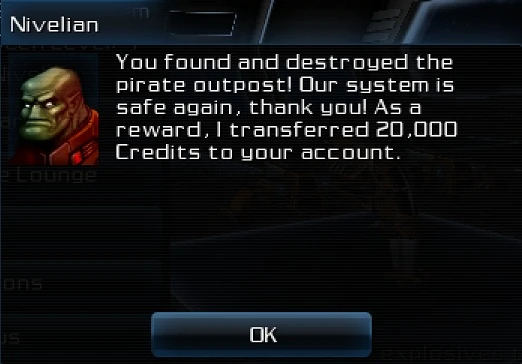
Once destroyed, you can return back to the space station that you were trying to dock at, upon which you should be allowed to dock and receive a welcome message:
A Thankful Nivelian...
How To Return To Void Space After The Storyline Is Complete[]
While the storyline is still running, you can visit Void Space by entering wormholes that appear on the Map. However, once you have completed the storyline, wormholes like that no longer exist.
When you are undocked from a spacestation, hit the button for Secondary Weapons/Wingmen/Khador Drive. Select "Khador Drive" where you will be asked whether you want to jump into Void Space (Yes/No). If you say "Yes", the Khador Drive will charge (this requires 1 energy cell) and you will then jump into Void Space. To return from Void Space, simply reactivate the Khador Drive and you will be sent back to the station from which you came.
Note: A later update added the possibility that energy cells appear in Mido so you don't get stuck there.
Note: If you sold your Khador Drive you can get 50 Void Crystals at a time from Thynome.
Making money[]
Do freelance purchase missions; these missions are excellent if you do not have the credits to start trading. Due to a glitch, if you reject the offer and talk to the client again, the item requested will be different. As the prices offered are usually above twice the market value, selling high-value commodities such as organs, implants, Collectible Figures, Vossk Organs, rare animals/plants, Buskat, and the like will earn a large amount of money.
The best way to abuse this once you have enough credits is to stock up on Vossk Organs every time you see them, and slowly sell them off to these clients.
The quickest and easiest way to make money (with the Khador Drive) is to get a ship with a massive cargo area, (like a Rhino), and stock up on big ticket items - Organs, Rare Plants and Rare Animals. (To further extend your cargo hold space, purchase the blueprint and produce a Rhoda Blackhole.) If you can find a place with, for example, 150t of organs at $4000 a ton and then take them to a place where you get $6000 a ton, that 150 x $2000 profit = $300,000. Also you can go to Pescal Inatru and search for Vossk Organs there, then take them all and go to Wolf-Reiser or Loma and sell them. Profit is about $7000-$8000 each ton. So about 200 Vossk Organs can give you about $1.4m
Another way to gain a lot of money is to buy a Cormorant or Rhino and go to Wolf-Reiser and Aquila and hunt down lots of Implants. Then go to Pan, sell all the Implants, and buy Vossk Organs and Organs which are common in the Pan area. Then go back to Wolf-Reiser, sell all the Vossk Organs/Organs, and search some more for Implants in Wolf Reiser and Aquila. This can get you about 1m per trip (?)
Stations usually with lots of implants: Carme, Io Ombak. Usually there are a lot of implants there.
Stations usually with lots of organs: Emisto. I have seen 400t of Vossk Organs there before.
Also if you have around $200,000 you can use your Khador Drive to go to Loma (Valkyrie Add-on) to sell high priced items as said above. Just use a booster to get through> the pirates if you decide to deny their request. You usually get around $5,000,000 in around 20 minutes! This really helps if you have average ships such as a Teneta or a Groza.
Another nice option is selling the Khador Drive. Once you have it, just build a second one which costs about $30k and sell it for $280k, which is a nice $250k win with every drive sold. Remember that you need to collect the 50 Void crystals, but those come more or less for free as you can mine them yourself or purchase a ship with a Khador Drive pre-installed (such as a Cronus).
If you buy/get the Kaamo Club station then buy another ship (and the Supernova and Valkyrie add-ons) then try getting the M6 A4 "Raccoon" and put it in your store. Swap ships and go back to store, grab your Racoon and again swap ships. Go back to store and (if it didnt work try again) you will see a different 1t of the object you put in will be there in your store so grab it. Keep swapping ships. If you swap again, go back to store you will see the same thing happened. It doesn't have to be a Raccoon. it works with other stuff too. After you have gotten about 30t or 40t go to a station and sell it. There is also a video about this.
NOTE: Look at the item tech level when going to a system, and where the item is cheapest.
To find out where to sell your goods, touch the "i" symbol next to the commodity to see the known price range and buy from the system at the low end, and sell at the system at the high end.
NOTE: Some good systems found for trade are Pan (which is hidden) and Wolf-Reiser. Search to find high quantities of Implants or Rare Animals to sell in Pan, and then search for Organs and Luxury to bring back to Wolf Reiser. (you could also check Aquila for Implants or Rare Animals).
If you find an freighter which is carrying Vossk Organs, destroy and loot it and sell their cargo. If the freighter has around 25 Vossk Organs you will gain a lot of money! You can buy your reputation back for less than the price of just one Vossk Organ.
Another way to make quick money is harvesting Void Crystals. the second time you enter Void space (this will be to set the probe of the Void mother ship) you will only be attacked by 3 Void ships at a time, they are easy to kill at this stage and you get a fair amount of time to mine crytals. The really profitable part however is after you return through the wormhole, sell your crystals and exit the station the wormhole is still there. Then you repeat repeat repeat. I got about 200,000 a trip when I did it.
There seems to be a supply and demand aspect to commerce in the game. A neat trick is to buy all the construction goods from a station - electronics, radioactive goods, etc. Then, leave the station and re-dock. Having just created a need on that station for construction goods, you can sell them back to the station for more than you bought them.
Post-Valkyrie Changes:
- If you buy the Valkyrie expansion, the speed with which you can make money increases significantly. The main reason is that the new Valkyrie-only pirate system Loma has the highest 'buy" prices of any system, which means that selling goods at Loma will always yield the greatest possible profit even after paying the "bribe" fee to travel safely within the system.
- In general, the best places to buy key trade goods at the lowest prices possible are Pan (Organs and Luxury Goods), Suteo (Turrets), and Aquila/Wolf-Reiser (Implants and Rare Plants).
- Early in the game story line, the best balance among profit per credit invested, required cargo space, and number of system jumps is buying Implants in Wolf-Reiser (cheapest) and Aquila (nearly as cheap), then selling them in Loma. You can hop back and forth between Aquila and Wolf-Reiser until you acquire a full cargo bay of implants. (Leaving a system and then coming back resets the hangar inventory in that system.) Each implant found/sold this way will yield roughly 80% profit. If you don't want to spend the time jumping back and forth to buy only implants, you can also make a roughly 80% profit on Rare Plants from Aquila and Wolf-Reiser. Using this Wolf-Reiser > Aquila > Loma trade route for Implants and Rare Plants will enable you to by the most advanced gear and ships possible very quickly, especially if you invest in a Cormorant and cargo compressors as early as possible. Adding a good automatic turret, good speed booster, and a stealth device to the Cormorant will make it possible to safely get to any station without the need to actively fight maurading pirates near the stations and jump gates.
- The best way to trade on Loma with the Cormorant is to equip 6 Rhoda Blackholes, 1 stealth device (I prefer the U'tool as it only consumes one energy per use), and 1 shield to survive any firing done on you. A turret won't be necessary because you'll be able to fly past any enemies with this technique and an automatic turret will mess it up. First go to any nearby planet with a highish tech level and buy as many cheap things as you can, commodities/weapons/turrets/equipment. You may need to go to a few planets if you have a lot of money left over. With the Cormorant's 2450 tons of space you'll only be limited by the amount of money and not your cargo hold. When you're all out of money go back to Loma. First use the quick target button to target the space station. When the pirate boss asks for money say no. Then he'll go into dialogue and you'll start being fired upon. Without a scanner however your ship registers no enemies around and you can still hit the fast forward button to speed towards your target destination. Hold down fast forward and zoom past all the pirates to get into the station without getting killed. Sell everything but keep 10 or so energy cells to use for your cloak. When you leave the station the boss will do his dialogue again. Use the quick target to target the jumpgate and hold fast forward again. Use your cloak when you're roughly 1.5-2km away so it can charge up. You should be able to get to the jumpgate while cloaked and escape without getting shot down. Then you can go back to a nearby planet and stock up on things again. This method is much cheaper then paying the 2% tax and nets about 1mil of profit a run on a full Cormorant.
- Buying cheap items in the Suteo system then selling them at any station in Loma nets approximately a 20-40% profit as long as you evade the pirates instead of paying the bribe. For example, very expensive turrets are very cheap but in plentiful supply in Suteo and a profit of 70-80,000 credits is made on each Skuld AT XR purchase. It only takes a few hours of trading to get the 30m credits needed for Kaamo with this technique. (Note: Skuld AT XR turrets are not purchasable in Suteo at lower player levels early in the game story line.)
Effective and Accurate Attacks[]
In Battle Skills:[]
When fighting in a battle, and are completely surounded by enemies, or there is a lot, use one of the special touch screen menuvers to avoid direct hits. To use this effect, swipe to the left (making sure to stay inside the scanner circle) to make the ship jerk abruptly to the left, and same with the right (again keeping the swipe within the scanner circle). this technique has won many battles and have gotten people out of many of unfortunate dogfights with pirates. This skill is exceptionally useful when in the Loma system (Valkyrie expansion only) and are in short supply of esential cloaking device mediums of energy cells.
Post-Valkyrie analysis:[]
With the advent in the Valkyrie expansion of automatic turrets (especially the long-range, craftable HH-AT "Archimedes", the longer range SunFire o50 thermo weapon, and the very long range, craftable Icarus Heavy AS scatter gun, it is possible to fight very effectively with only 3 primary weapon slots and a turret slot, making a wider variety of "ultimate class" ships strong competitive choices with the "best" pre-Valkyrie ship choices. The Veteran, for example, becomes an extremely formidable ship when equipped with a good automatic turret, a long range thermo weapon, the Icarus Heavy AS (which fires AOE rounds), and a long-range laser such as the standard Berger Converge IV or the Valkyrie-only, craftable Disruptor Laser.
Lasers:[]
With lasers, you are advised to close the distance, and attack up close, using missiles when you can. With the Beam lasers, you are advised to keep the target within medium range, using boost to accelerate to an adequate range, as in close quarters, targets will often mow you down, your Beam lasers not firing fast enough to hit accurately at close range.
Automatic Turrets (Valkyrie only):[]
If you have purchased the Valkyrie expansion, it introduces new automatic turrets that are extremely powerful and make it more difficult to choose from among the various "ultimate class" ships. For example, the Veteran and the new Valkyrie-only S'Kanarr both become very strong ship choices compared to the Mantis and other "ultimate" ships, by virtue of those two being the only "ultimate" ships that have a turret slot. Automated turrets are automatically toggled on every time you exit a station or warp into a new planetary system, and they automatically fire at all enemy targets that are within the weapon's range. You can manually toggle OFF the turret with a button that appears above your right-hand control pad; doing so is advisable when entering the pirate system Loma, for example, to avoid aggroing the pirates before they can offer you a chance pay the bribe for safe passage. The craftable HH-AT "Archimedes" turret has an exceptionally long 6600m range and moderately high DPS, so it alone can often score multiple kills while you are mining or traveling from point A to point B. In battle, automatic turrets can account for nearly 50% or more of your total kills in a big swarm while you are chasing down specific targets with your primary weapons. Finally, automatic turrets are very useful for dealing with nearby enemies that have engaged you in dog fights and are too close to chase effectively, particularly if you have a ship with low Handling stats. You can focus on the more distant enemies in front of you and let the automatic turret deal with the enemies that keep staying close and getting behind you.
Automatic Turrets can also help you recognize potential threats. For example, when surrounded by pirates, the auto-turret will turn towards the nearest enemy, alerting the pilot of incoming attacks. The pilot can then easily dodge enemy fire. This is helpful when completing the Blindfolded Killer medal in the Supernova DLC.
Scatter Guns (Valkyrie only):[]
If you have purchased the Valkyrie expansion, it introduces new scatter guns, which fire AOE rounds that explode when any object comes close to the proximity of each round. This means you don't need to score an exact hit but merely to come close to your target. Each round explodes with an AOE blast of a certain Magnitude that will affect all other nearby targets within the Magnitude radius. The craftable Icarus Heavy AS has an especially long range of 5000m. A downside to this weapon type is that its proximity effect and AOE damage does not discriminate between friend and foe (or asteroids, etc.), so you must exercise restraint in firing your primary weapon battery if this weapon is equipped, making sure you don't fire at enemies who have friendlies nearby.
Thermos:[]
Thermos are very effective if used correctly because they are the only primary weapon type that will actively track the target for guaranteed hits if the target is in range of the weapon and you have a target lock. To make an effective attack, one must be quick with boosts, and have a scanner with a very short Time to Lock (such as the Hiroto Ultrascan), otherwise the weapon will be rendered effectively useless. Similar to how you must hold your reticle over an asteroid/planet/station/jumpgate and wait for a scanner lock, you must hold your reticle over an enemy ship long enough to acquire a target lock, at which point a red crosshair will appear over that ship as long as they stay near the center of your forward view. While this crosshair is visible AND if you are within the weapon's listed range, all thermo bolts will track and hit the target. At initial attack, keep the opponent at a distance, to enable the scanner to make a more accurate scan. Then, the player must use boost to close the distance. The drawing rate of the Abyss engine will not allow for more than a certain amount of bolts to fill the screen, so it is advised to get up close as the bolts will connect faster, will allow for a maximization of the thermo weapon's firerate.
Also, remember that ALL thermo bolts will attack the ship that you are locked on to.
ie. You scan a pirate ship, launch thermos, accidentally scan some random terran ship, and all the bolts will come back to attack the terran ship, etc.
This can also cause hilarious moments as they "come back". In the right angle / distance, thermo bolts can sometimes orbit around an enemy ship until it dissapears. (Bolts do not turn instantaneously.)
Auto-cannons:[]
These extremely fast rapid-fire weapons are the choice of a striker. The rate of fire is suitable when paired with an agile ship and the Polytron Boost due to the combined speed. These are the easiest weapons to use.
Blasters:[]
Blasters are the children of mass drivers and lasers, preserving the damage of lasers, with the increased fire rate of a mass driver. To make effective use of this type of weapon, one must equip dumb-fire rockets such as the Jet Rocket, or the G'Illisk. Use boosters to close the distance and fire missiles liberally, and fire your blasters without stopping. Your blaster will paint a line of bolts across space, most, or even some hitting the target. The rockets will make up for the lost hits, leading to a quick takedown.
Quicker Missiles:[]
When you boost, missiles get a brief jolt of speed, allowing for them to hit your targets sooner. This can be invaluable to use in one on one jousts, as you can get 4 out of 5 missiles to hit, instead of the nominal 3 out of 5. This also seems to make unguided rockets and bombs far faster than their normal speed, allowing for an unprecedented amount of rockets flying about onscreen. Combine this with the Blaster or Laser tactics to create an even more accurate attack.
Pseudo-Kamikaze Manouver:[]
When there are many enemies near you and you are in a critical state (or just wanna have fun) use the "Pseudo-Kamikaze manouver". "Pseudo" is because you don't die. "Kamikaze" is because you "sacrifice" yourself to kill the enemies. The only thing that you need to do this manouver is a Nuke (AMR Extinctor is the best but AMR Oppressor is easier to find and buy) and when everything is right, double-tap the Rocket button and the nearest enemies will be transformed into cosmic dust, and the "not-so-near" enemies will take SERIOUS DAMAGE!
This technique, however, cannot be used in Extreme difficulty, as a nuke detonated near your own ship in Extreme mode will destroy yourself as well. In extreme difficulty one can substitute the nukes with mines since they don't do any damage to your ship when they detonate at close range.
Visiting the stations and systems[]
When you're playing, the stations you visit are marked with a checkmark, and when every station in a system has been visited it will also be marked with a checkmark. If you remember to always check the space lounge's of the stations you visit, this will save you much time when hunting for blueprints and system coordinates.
Finding weapons and equipment[]
All the weapons and equipment in game (excluding Blueprints' ones) can be found on the hidden systems' stations. Below is the list of all their types and where to find them:
- Boosters, Thrusters - Ni'mrrod, Ekrr U'rra
- Rockets, Missiles - Ni'mrrod, Narsaxa
- Cabins, Cloaks - Ni'mrrod, K'ane
- Scanners, EMP Bombs and AMR bombs - Ni'mrrod, S'porrk
- Shields - Suteo, Anesa
- Turrets - Suteo, Nehébru
- Armor - Suteo, Posého
- Tractor Beams, Drills - Pan, Taygete
- Compressors - Pan, Emisto
- Blasters, EMP blasters - Y'mirr, Ba'rrtu
- Auto-cannons, Thermos - Y'mirr, K'mirkk
- Lasers - Y'mirr, G'ukkion
- Ore (except Void Crystals) - Y'mirr, Rr'ostam
- Ore cores (except Void Essence)- Y'mirr, P'arrenkk
- Commodities - Wolf-Reiser, Thynome
- Void Crystals - Wolf-Reiser (Only when the player does not have a Khador Drive onboard. They will appear if the player leaves their Khador Drive at Kaamo)
Massive Storage[]
Compression devices stack their effects. This means you can use multiple items to increase your storage, most importantly more than one Rhoda Blackhole. This can turn a freighter into a mega money maker, or a fighter ship into a quick fix trade vessel when needed. With the right ship you can easily have over 1500 tons of cargo space using this method. If you own a Rhino and equip it with 5-7 Rhoda Blackholes you can get around 3000t (tons) of cargo space. This is also a way to complete the Supernova DLC medal that requires you to have 3000t of free cargo space.